
Monday, September 28, 2020

Sunday, April 28, 2013
How to fix a rough running carburetor- the easy way!

Step 1. Make sure that you don't have an electrical problem.
As you know I had just that as evidenced by my first long trip on the naked wing. The bike ran really rough and would not stay running because the charging system wasn't working. To fix this issue I turned to the world leader in Old Gold Wings, Randakk's Cycle Shakk. www.randakks.com
On his blog there is a complete guide for testing the charging system. It has tests for the stator, rectifier, regulator and battery. I spent about 30 minutes testing continuity on the different components and found that they should all work.
I also found that one of the yellow wires from the stator to the rectifier had arced out and melted the wire. From what I've read arching happens when there is a poor connection. To avoid another 'bad' connection, I broke the harness apart (it was already melted) and reconnected each of the wires separately.
* before destroying the harness, mark your wires.


The bike started right up. I took it straight to Auto Zone and had the guy there put his load tester on it. results: 13.4V at 1,250 rpms. I believe that it should make 14.1V somewhere between 3000 and 4000 rpms but I didn't rev it up to test it.
While at the Auto Zone I asked the guy if he knew anyone who was good at adjusting carbs. I still had a little lope on the low end between idle and about 2500 rpms. He recommended a guy named Geoff at Red Rock ATV. www.facebook.com/RedRockATV
I made a call and then jumped on the bike to take it out to him. It ran like a champ.
Before I got off the bike he met me outside with a set of vacuum gauges (and a truck load of complements on how good the bike looks). Made one tiny adjustment to the left side. Tested the right. Rolled the throttle and... YOU'VE GOT TO BE KIDDING ME!!!
No lope, hesitation, hiccup, nothing. Screaming Fast throttle response. If he wasn't a dude I would have kissed him. I asked him how much it would be and he wouldn't take payment. He said that he didn't do anything. (My aching back) I told him to at least take it for a ride up the highway. Reluctantly he did and the first words out of his mouth were, "That's stupid fast!". Yes it is.
Lest you think I've forgotten.
Step 2. Take it to Geoff at Red Rock
Not only is he good at what he does, but he has a genuine interest in the bikes he works on. He recognizes the work that goes into bikes like mine. He has bought and repaired several older bikes and shares the vision that us builder/riders only know. He can also order most anything for these older bikes. No more bone yard salvaging.
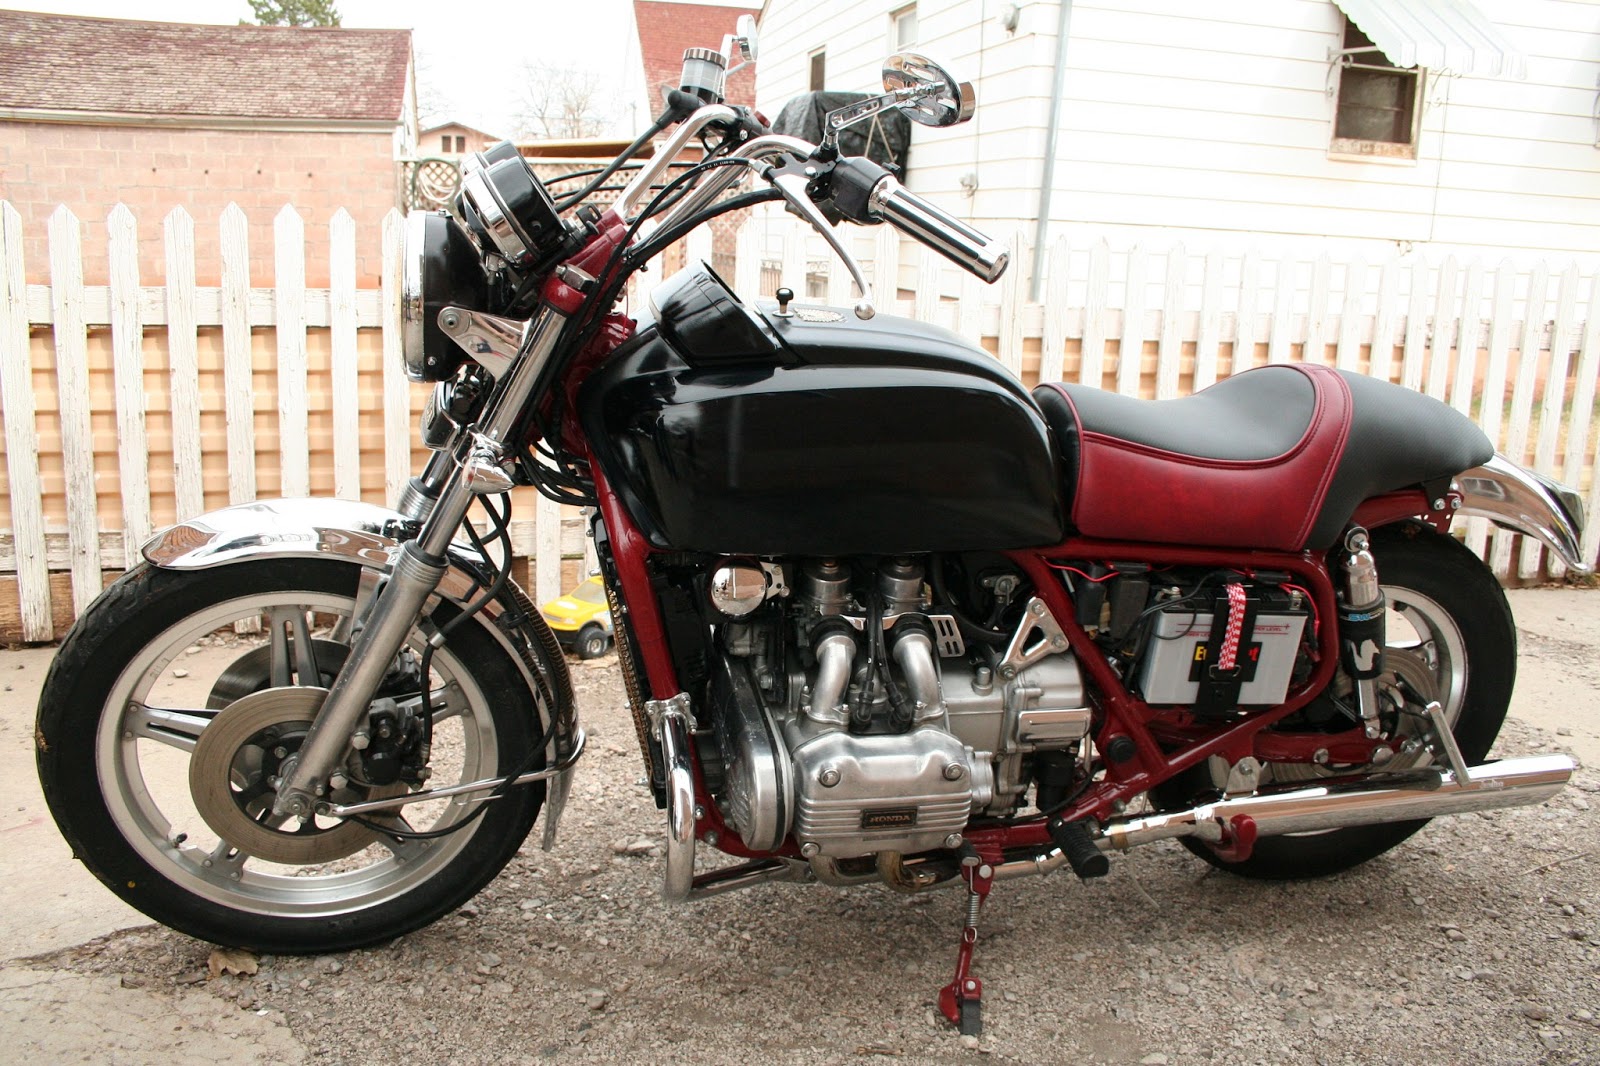
I told you it was an easy fix to your worst carburetor issues.
Tuesday, April 23, 2013
Wind Chill Chart

Image from:
www.megamotormadness.com
How cold is too cold to ride? I don't mean polar bear riding either. I mean at what temperature can a guy reasonably dressed get the bike out and enjoy a ride? I looked to NOAA (National Oceanic and Atmospheric Administration) to find out.
With a name like that you shouldn't be surprised when you see this whiz-bang formula for figuring out how to calculate wind chill:
New Wind Chill T(wc) = 35.74 + 0.6215T - 35.75(V0.16) + 0.4275T(V0.16) where T(wc) is the Wind Chill in degrees F, V is the Wind Speed in MPH, and T is the temperature in degrees F.
Well... I'm a dumb motorcycle rider so my suggestion is to just follow this link back to NOAA and plug it in their calculator.
http://www.crh.noaa.gov/ddc/?n=windchill
Or you can look below.
| Riding Speed (MPH) | Air Temperature (degrees F) | |||||||||||
| 45 | 50 | 55 | 60 | 65 | 70 | 75 | 80 | 85 | 90 | 95 | 100 | |
| 50 | 33 | 40 | 47 | 54 | 61 | 68 | 75 | 83 | 90 | 97 | 104 | 111 |
| 55 | 32 | 40 | 47 | 54 | 61 | 68 | 75 | 83 | 90 | 97 | 104 | 111 |
| 60 | 32 | 39 | 46 | 54 | 61 | 68 | 75 | 82 | 90 | 97 | 104 | 111 |
| 65 | 32 | 39 | 46 | 53 | 61 | 68 | 75 | 82 | 90 | 97 | 104 | 112 |
| 70 | 31 | 38 | 46 | 53 | 60 | 68 | 75 | 82 | 90 | 97 | 104 | 112 |
| 75 | 31 | 38 | 46 | 53 | 60 | 68 | 75 | 82 | 90 | 97 | 104 | 112 |
I took the liberty of extending out the scale on NOAA's site to riding speeds and warmer temperatures. If you would like a copy of this in either PDF or Excell just leave a comment with an email address and I'll send it to you. Blogger is very limited on what I can post. Or at least I'm not smart enough to do it.
You'll notice that at 75 degrees the scale levels off and above that it actually climbs. If it ever gets warm I'll have to remember to stay hydrated while I ride.
Saturday, March 16, 2013
What Crash Bars Are Suppose To Look Like


I had to stretch her legs a little so I went for the first ride of the season. It ended up being a very short ride. There is a long stretch of two lane out by our airport that was repaved last year and rarely has any traffic. Just because I can, I opened up the throttle on the stretch.
This is what I found out:
4th Gear + 7000 RPM's = 100 MPH
I just touched 100 and then shifted out as she was showing no signs of stopping. Red line is 8000-9000 but I didn't want to touch it. No need to really.
When I bought these bikes the previous owner told me that "the '78 always ran hotter than the '79.". Well, he wasn't just a kidd'n. That naked wing is sporty.
So the short part of the ride came after racing down the strip a second time and as I slowed to stop and check the bike over.....it died! I rested it for a few minutes wondering if it was just hot, but it appears that the charging gremlins are not going away. Weird I know!
To Be Continued: Busted Rectifier
Tuesday, December 25, 2012
Not All Case Guards are Created Equally
For simplicity lets break them up into two categories:
1. Small and Ugly
2. Big and Ugly
Lets begin with the Small and Ugly as they are the most prevalent. To my knowledge Mother Honda did not provide these stock for the earlier years. They probably wanted the aftermarket crew to weed out all the the bad ideas for them.
With the valve covers sticking out so far on this H block, there were several styles that went to work to protect the covers at all cost. Including looks.


 The Hondaline case guard, engine guard, highway guard (whatever terminology you prefer) has an inch and an eight body and are a single tube. No convoluted bars wrapping every-which-way and blocking all access to the rest of the bike. Simple, strong and sexy. They also allow for adding the aftermarket floor board kits like I did on the dressed wing.
1. Small and Ugly
2. Big and Ugly
Lets begin with the Small and Ugly as they are the most prevalent. To my knowledge Mother Honda did not provide these stock for the earlier years. They probably wanted the aftermarket crew to weed out all the the bad ideas for them.
With the valve covers sticking out so far on this H block, there were several styles that went to work to protect the covers at all cost. Including looks.


This style is the most redeeming of the Ugly and Small but are a functional nightmare as the riders shins will most likely hit the back side of the guards. That was my biggest complaint.


Now on to the second category. Big and Ugly. Some people don't know when to stop!


This set is the clear winner of the Big and Ugly category if you have to go with one. The front is still quite ugly but they are probably the least offensive of the lot.
Hondaline came out with a simple, solution to this catastrophe. These little gems below. They are extremely difficult to find in the wild and almost never off of a bike. As for trying to get someone to sell you a set off of a bike, you can almost forget it. The owners will never part with them.
My wonderful wife found me such a set, after all my failed attempts, and gave them to me for Christmas. I'll post up some pictures as soon as I get them polished up and mounted. I'm excited as they are going to look really nice on that bike.
Monday, October 22, 2012
MSF Basic Riders Course

It is a two day course that is specifically designed for the novice rider. It starts off with the fundamentals of motorcycle riding much like the drivers education class does for novice drivers. For example: What are the controls? Where are they located? How are they operated? All things that are very important if you've never rode a motorcycle before. I have had my motorcycle endorsement from the DMV since I was 16 so I just patiently waited out this part of the course.
The course continues on to operating the bike in various environments that a rider would experience on our road ways. Rain, moron drivers, obstacles, moron drivers, low visibility, moron drivers, moron drivers and moron drivers.
One big part of the MSF course is emphasizing the use of proper riding gear. DOT or Snell approved helmets, proper fitting eye protection if the helmet doesn't have a visor, full finger gloves designed for riding, long sleeved shirt or jacket, long pants(all of which should be of a fabric designed for riding), over the ankle footwear with a low heel.
All great suggestions and you should always wear proper gear when riding. It is just smart practice.
The class goes on to cover safe following distances and legal amounts of alcohol consumption just like the DMV does for automobile drivers.
The riding portion starts off really slow and appropriately so for the novice. Finding the friction point of the clutch and just rocking the bike forward and back. This is a good practice for anyone that is riding an unfamiliar bike. After about 5 minutes of that however I was quite bored of the exercise. I should note that I was using a Kawasaki Trail Way that was provided for the course as my naked wing's rectifier had failed me that morning.
After friction point it was on to power walking the bike where you just engage and disengage the clutch as you walk the bike along sitting on the seat. After this followed the long awaited ride the bike in the same straight line but very slowly.
It wasn't long before the instructor realized that myself and the one other person in the class had some significant experience riding and he adapted the class accordingly.
The process for the class is: Explain, Demonstrate, Explain and allow to practice until the skill is mastered. In our case, the practice was cut short to just a few laps to demonstrate our proficiency. He never deviated from the pattern but as soon as he saw we could do the skill then he would move on.
There were quite a few small bad habits that he pointed out about the way I ride. The biggest thing is that I don't look far enough ahead in my turns. I blame this in part to the fact that I didn't want to run over any of his stupid little cones, but the fact remains that I can and do ride better if I'm looking ahead and not so fixated on what is right below the bike. Ooooh! Shiny!
In the end the course was good. Having it done now allows me to take the Advanced and Experienced Riders Courses that the MSF offers. My only regret was not being able to take the riding test on my Wing. My card has the -649 stamp on it. Meaning that I am safe to ride a motorcycle under 649cc's. I'll just have to get the wing running better and clep out the test in the spring. That's my plan anyway.
Tuesday, October 2, 2012
Saturday, September 29, 2012
Third Ride

I put about 15 miles on it and here are my findings. The low end, 1000-3000 RPM's runs really rough even after it warms up. It has a fair amount of back firing in that range as well. Above 3000 she'll run away from you if your not holding on. Out on the airport road, after riding for bit at the speed limit (50 mph) I decided to push it a little. In fourth gear the speedometer climbed right along side the tach and wasn't backing down. I came out of 4th at 80 (and still had plenty to go) and about 6000 rpms. I don't red line until 9000.
If I can get the low end to match the top she'll be a fast machine.
I spent a little over an hour bleeding the rear brake and finally had some success. It burped out a lot of air and started to firm up to where I couldn't move the rear wheel by hand with the bike on the center stand. I figured that a ride would help burp some more air to the surface. Before I got home the rear brake felt soft again and I'll bleed it the first of next week after it has had some time to think about what it has done.

Wednesday, September 26, 2012
Drum Roll Please....
Yes I did finally get the long awaited phone call. The Naked Wing is ready for pick up. So today after work Rachel and I rode out to see if this was some kind of joke. Here is my assessment.
The bike runs and sounds good. They adjusted the valves, cleaned and tuned the carbs, fixed the exhaust leak and the ignition. The new Dyna S seems really good. The bike is responsive and feels pretty good.
They did not however, pump up the rear brake(which I found out after attempting to stop on the highway) despite my incessant asking specifically about the brake. They marred up my powder coating, covered the lower half of the bike in grease and what looks like antifreeze, broke my radiator overflow cap and left greasy hand prints all over the bike. Lots of dark black grease. Not just finger print looking smudges. It was more like they used the bike as a rag to wipe their hands on.
After cautiously riding it home I began disassembly again to re route wires and cables that they had moved. Found several loose nuts and bolts and more grease.
I was told that the bike had been in the shop the entire time. After seeing the shop I can believe such a statement. I would have to guess that while working on every other bike in the shop they they started them with the tail pipes in a bucket of oil and antifreeze to see how far each of the bikes could blow the oily mixture. Lucky for me, my bike remained in the shop for all those demonstrations.
Well at least she is home now and I can give her the proper care she deserves.
Next step. Fix brakes and Horn so I can legally put her on the road.
The bike runs and sounds good. They adjusted the valves, cleaned and tuned the carbs, fixed the exhaust leak and the ignition. The new Dyna S seems really good. The bike is responsive and feels pretty good.
They did not however, pump up the rear brake(which I found out after attempting to stop on the highway) despite my incessant asking specifically about the brake. They marred up my powder coating, covered the lower half of the bike in grease and what looks like antifreeze, broke my radiator overflow cap and left greasy hand prints all over the bike. Lots of dark black grease. Not just finger print looking smudges. It was more like they used the bike as a rag to wipe their hands on.
After cautiously riding it home I began disassembly again to re route wires and cables that they had moved. Found several loose nuts and bolts and more grease.
I was told that the bike had been in the shop the entire time. After seeing the shop I can believe such a statement. I would have to guess that while working on every other bike in the shop they they started them with the tail pipes in a bucket of oil and antifreeze to see how far each of the bikes could blow the oily mixture. Lucky for me, my bike remained in the shop for all those demonstrations.
Well at least she is home now and I can give her the proper care she deserves.
Next step. Fix brakes and Horn so I can legally put her on the road.
Friday, August 24, 2012
I'm a precision instrument of speed and aerodynamics.
Well... at least the bike will be. I dropped by Sprockets to check on my naked wing today and found out that it was indeed the old Martek electronic ignition that was bad. Some surprise I guess. All the forums that I read said that they weren't that great and that they've switched them out for the Dyna S by Dynatek. The picture and caption below are from their site: http://www.dynaonline.com

Product Overview : Sportbikes - Dyna S Ignition System

Product Overview : Sportbikes - Dyna S Ignition System
Dyna S Ignition System is a complete self-contained electronic ignition system built with the latest state-of-the-art engineering. This is the same ignition used by top racers over the past 2 decades.
The Dyna S is completely housed behind the ignition cover and uses a magnetic rotor with the original spark advancer, so the factory advance curve is maintained.
The venerable Dyna S ignition System is a time proven solution to the basic ignition needs of the vintage muscle bike. As a stand alone ignition the Dyna S is the standard of performance and reliability.
The precision instruments of speed and blah blah blah. My hope is that between the new ignition, synchronized carbs, K&N filters and Jardine Rumblers, that this old wing runs like a champ.
You better pour some Sea Foam through your carbs Ty because I'm coming after your Suzuki first. And if the Monster ever makes it up to Utah it better be ready for the track. I aint scared.
Thursday, August 9, 2012
Sprockets?

In my frustrated state of not being able to get this bike to run smooth, despite a quart of Sea Foam, I payed a visit to the local Honda dealership. As soon as I mentioned that I had a '78 Goldwing the guy at the counter said, "We wont work on any thing that old."
Some mumbo jumbo about not being able to get parts and can't find tools that old, no bikes use carburetors any more, blah blah blah...
So I called another local bike shop called Sprockets in Monroe UT. The owner answered the phone and knew just what I was trying to explain about the bike starting but only running at certain RPM's. He said that by adjusting the jets and synchronizing the carbs we should be running like a champ. That's what I like to hear. Tomorrow the Naked Wing will take her first road trip, via trailer, to the shop to get a good one over.
The next time I see her I'll be saddling up to ride her home. Whoot whoot!
Monday, July 2, 2012
Pop No Kick
So I got adventurous tonight and tried to breath life into the old wing. After chasing a few wires with the help of a free wire diagram, I was able to find the allusive black wire from the rear brake switch and make the connection.
A little fuel, a little choke and few shots of ether and she starts. But. She won't run. It has to be a timing issue. When I can keep it going it gets a lot of backfiring and smokes like it is running rich.
I looked on Randakk's and the firing order is 1-3-2-4. The front two cylinders are fired off of the right coil and the rear two fire off the left.
Where my bike has the Martek electronic ignition it might be a bit of a chore to get it timed properly as it is really hard to find the literature for Martek Industries. There is plenty out there for the contact points that Mother Honda originally installed but Honda didn't adopt the electronic ignitions until the GL1200.
No recordings of engine sounds tonight. But what I did hear sounds good.
Sunday, July 1, 2012
Gold in your Grill?
It has been a slow go for the past few weeks for a few reasons. One, no time and two no parts. I finally received the air shock fittings and air line only to find out that the fittings wouldn't fit. So I over paid for the lines but now the rear shocks are finally doing their job.
 I also ordered the last of the headlight rings and all the associated spring locks and bolts to put it together. It is plugged in and working like a champ.


 I also ordered the last of the headlight rings and all the associated spring locks and bolts to put it together. It is plugged in and working like a champ.
I had to wait for a calm-ish day to paint the few remaining pieces that I had forgotten. Two of them were radiator trim and I couldn't bolt it up until they were done. In the process I painted the radiator grill gold and I am happy with the way it turned out.

The goal for this week is to get the electronic ignition connected, and see if we can hear what those Rumblers sound like. Oh, I hope the seat will be done this week too. Pictures will follow.
Sunday, June 3, 2012
This is how I know my wife loves me.
How many wives will allow their husbands to get away with this?


 The fender looks like a dirt bike because the shocks are not sealed. They are fully extended in this picture. It looks a lot better off the center stand.
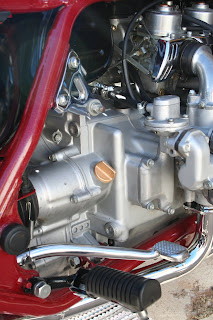
I got the controls mostly on. I need a few parts for fix the horn button on the clutch side. New brake master cylinder reservoir, mirrors, paint, grips and chrome bolts to match. Turned out okay.


Yes you are seeing correctly. I am washing old greasy motorcycle parts in the family bathtub. This was a few weeks ago when it was still to cold for washing outside, and I really needed to get these parts cleaned up so I could keep working on the bike.
I have also washed several items in the kitchen sink. In my defense, I clean it afterwards.
Well if that isn't reason enough then this will for sure put Rachel in the Who's Who of loving wives 2012.

Those are indeed the very Jardine Rumblers that I've looked at for a very long time but haven't bought because they are fairly expensive. Not only are the expensive, but as their name insinuates, they are very loud. Two strikes against them in Rachel's book. So for her to buy them for my birthday was a true demonstration of love.
So enough of the sappy crap. Here are a few more pics of the progress so far. Reassembly is far more time consuming then disassembly.
I had to cut the OEM rear fender to make the Harley V Rod tail light fit. After we cut the hole in the fender we had to use some of the iron worker genes that run deep inside our veins to pound a good portion of the curve out of the tail. The Harley fender is very flat and so is it's light, but with some not so gentle persuasion we made the fender to fit.
 The fender looks like a dirt bike because the shocks are not sealed. They are fully extended in this picture. It looks a lot better off the center stand.
With Dad's help we got all the black painted. It's a gloss black automotive paint and 2 layers of automotive high gloss clear coat. It's shiny enough to see the dust on the bike like in this picture.

I took it upon myself to do a little dressing up of the Honda emblems on the valve covers. One bottle of Gold Testers enamel and a very fine brush left me with this. I also shot it with clear coat.


I took it upon myself to do a little dressing up of the Honda emblems on the valve covers. One bottle of Gold Testers enamel and a very fine brush left me with this. I also shot it with clear coat.

Here is my second and third bits of Gold accent thanks to Testors. The oil filler cap(naturally) and the tops of the carbs. A bit hard to see in this picture, but subtle is the idea with accents.

I got the controls mostly on. I need a few parts for fix the horn button on the clutch side. New brake master cylinder reservoir, mirrors, paint, grips and chrome bolts to match. Turned out okay.

Okay so is that enough of a tease? Fine then. below is an up to the minute look at the Naked Wing Project.


I like this picture especially in contrast to the one above because it really shows how dynamic this powder coat color is.
Sunday, May 27, 2012
Mothers Power Ball?.....Um Yes!
If you ever walked down the automotive isle in Walmart and come across the Mothers Power Ball and then have the question pop into your head, "Should I buy this?"; the answer is YES!
 It is a drill mounted heavy duty sponge that buffs like crazy. What if you don't have any thing to buff you ask? Buy one anyway. You'll find something and when you do...
 I has previously buffed my little heart out by hand on these timing belt covers and they came out all right. but I kept thinking that I needed something high speed. Well I was right about that. I used Meguiar's Metal Polish and a green scour pad to ruff up the oxidation from the aluminum.
 I then wiped it all down with a clean rag and applied a second thin layer of Meguiar's before buffing it with the Power Ball. The parts will haze up at first and in no time that lustrous shine will break fourth.
 Here is a side by side comparison.
 I looked at the Power Cone as well and after using the Ball I would say for a motorcycle application that the Cone would be nice. The Ball is good but big and it is hard to fit in a lot of the smaller places on a bike. The Cone would work nicely for that and has a large flat side for the bigger parts. This will be the next one that I buy.
All in all it was well worth the price of about $20 for two reasons: the time it saved me and the resulting shine on the aluminum parts.


All in all it was well worth the price of about $20 for two reasons: the time it saved me and the resulting shine on the aluminum parts.
Friday, May 18, 2012
How to remove Powder Coating
So you've got this sweet new powder coated motorcycle frame and it looks awesome. Until... you realize that it is everywhere. You didn't think twice about not having that part coated when you took it to the shop. Although it shouldn't surprise you any because you've seen it on every reality TV 'Pimp my trash into treasure' show out there. The cool looking parts come back and the crew goes to work drilling out all the bolt holes so they can put it all together again.
ToughCoat did a good job plugging my bolt holes and masking off the threaded studs, but there were a few places that neither of us thought about until it was time to put it back together again. I've posted a few examples below.
Powder coating is HARD. Really hard and thick. I first attempted to scrape it off using a utility knife but quickly found out that was a losing battle. My beautiful wife found this little gem on an internet forum and the following is my experience of how to remove powder coating.

Permatex 80645 Gasket Remover can be purchased at about any auto parts store for about $10. It is an aerosol foam that is much easier to control then a typical aerosol spray.
ToughCoat did a good job plugging my bolt holes and masking off the threaded studs, but there were a few places that neither of us thought about until it was time to put it back together again. I've posted a few examples below.
Powder coating is HARD. Really hard and thick. I first attempted to scrape it off using a utility knife but quickly found out that was a losing battle. My beautiful wife found this little gem on an internet forum and the following is my experience of how to remove powder coating.

Mask off anything that you don't want to remove. I used a heavy plastic and masking tape to cover the fork mounts up so I could remove the powder coating from the steering column. (Steering bearings are press fit and you'll never get a set to press on over powder coating.) So, I applied a liberal coating of the gasket remover and let it sit for about 30 minutes.

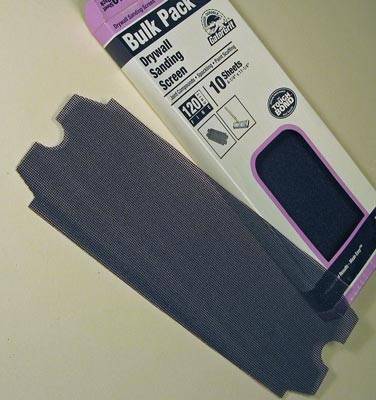


If you find yourself in this circumstance just remember to have patience and let the gasket remover do it's job. It's pretty slow and a little tedious but it works well and is easy to remove only what you want gone.
Subscribe to:
Posts (Atom)
